Lamps and Lighting
Leaded, Slag and Reverse Painted Lamps
Tell leaded, slag panel and reverse painted lamps apart, check a shade for cracks and repairs, and understand period wiring.
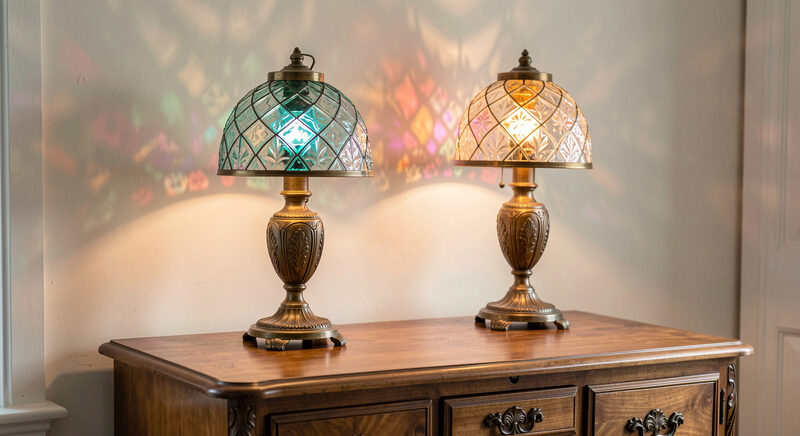
Leaded glass shades
A leaded glass shade is built from many small pieces of glass, each cut to shape and joined with strips of lead or a similar metal. The pattern is drawn in the lead itself, and the colour comes from the glass pieces. This is the technique most people picture when they think of a decorated lamp, and it produced shades of great complexity, from simple geometric borders to landscapes and figures.
Leaded shades fail at the joints. Over time the metal work loosens, the glass settles, and pieces crack. A single cracked piece can be replaced, but the quality of the replacement matters, and a shade rebuilt with the wrong glass or the wrong lead will not match its neighbours. Look at the shade held up to the light, turn it slowly, and watch for cracks, for pieces that have been filled, and for lead lines that wander where they should be straight. Then look at the edges of the shade, where repairs are often most visible.
Slag glass shades
Slag glass is glass of two or more colours, marbled together so that no two pieces are alike. It was used in panels and in whole shades, and it was also pressed into large single pieces that carry a moulded pattern. Slag glass lamps were made in quantity and remain among the most collected of all antique lamps because of the colour and the weight of the material.
The faults of slag glass are the faults of pressed glass. It chips at the edges, it cracks across a panel, and it can cloud where it has been cleaned with the wrong product. A slag panel that has been broken is often repaired with a piece of a different colour, which shows at once when the lamp is lit. Check every panel against its neighbours for colour and thickness, and look for the fine crack that appears only when the light is behind the glass. A good slag shade lit for a few minutes will reveal a repair that a photograph will not.
Reverse painted shades
A reverse painted shade is painted on the inside of the glass, so that the picture is seen through the glass when the lamp is lit and appears flat and dull when it is not. The technique gave makers a wide field for scenes of landscapes, buildings, flowers and figures, and reverse painted lamps are among the most sought after in the field.
Reverse painted shades are the most fragile of the three, because the paint sits on the inside where it cannot be cleaned without risk. Flaking, lifting and losses of paint are common, and repainting is a serious matter, since a repainted scene destroys the original work and is easy to detect once the lamp is lit. Examine a reverse painted shade under a strong light with the lamp off first, then lit, and compare the two views. Look for areas where the paint has been touched up, for scenes that do not sit comfortably in the glass, and for a surface that looks newer than the age of the lamp.
Wiring and safety on an old lamp
Many old lamps were converted to electricity long ago, and the wiring in a converted lamp is often as old as the conversion. Cloth covered cord, brittle insulation and worn sockets are all common and all unsafe. A collector should treat the wiring of an antique lamp as a hazard until it has been checked, and should never leave a converted lamp plugged in unattended.
The safe approach is simple. Have an electrician or a competent restorer examine the cord, the socket and the connections. Where the wiring is old, replace it, keeping the original parts of the lamp that can be kept. Where a lamp is to be displayed without being lit, unplug it and remove the cord if it is perished. Safety takes priority over originality in wiring, because the alternative is a fire. This is the one place in lamp collecting where the modern part is the right part.
What a good shade repair looks like
A repair to a shade should be visible to the person who made it, and honest about itself to the next owner. A replaced piece of glass should match the colour and the thickness of its neighbours as closely as the maker can manage, and the lead line around it should follow the original pattern rather than cutting across it. A filled chip should be recorded, not hidden. A shade that has been repaired well is a shade that can still be enjoyed, and a shade that has been repaired badly will show its faults the moment the lamp is lit. Ask what was repaired, and look at the answer with the light on.
Reading the lamp as a whole
A shade is only part of a lamp, and the parts must agree. A leaded shade of high quality on a cheap modern base, or a fine old base under a shade that does not fit it, are both signs that a lamp has been assembled rather than kept. Look at the fit of the shade on its holder, at the wear on the base where the lamp has stood, and at the colour of the metal across the parts. A lamp that has lived together shows matching age in every part.
The lamps and lighting guide on this site sets out the families of lamps, their burners, fonts and bases, and the care they need. Read it first, then come back to the shades with the lamp in hand. A collector who can read a shade, judge a base and question the wiring can buy an antique lamp with confidence, and can enjoy it safely once it is home.